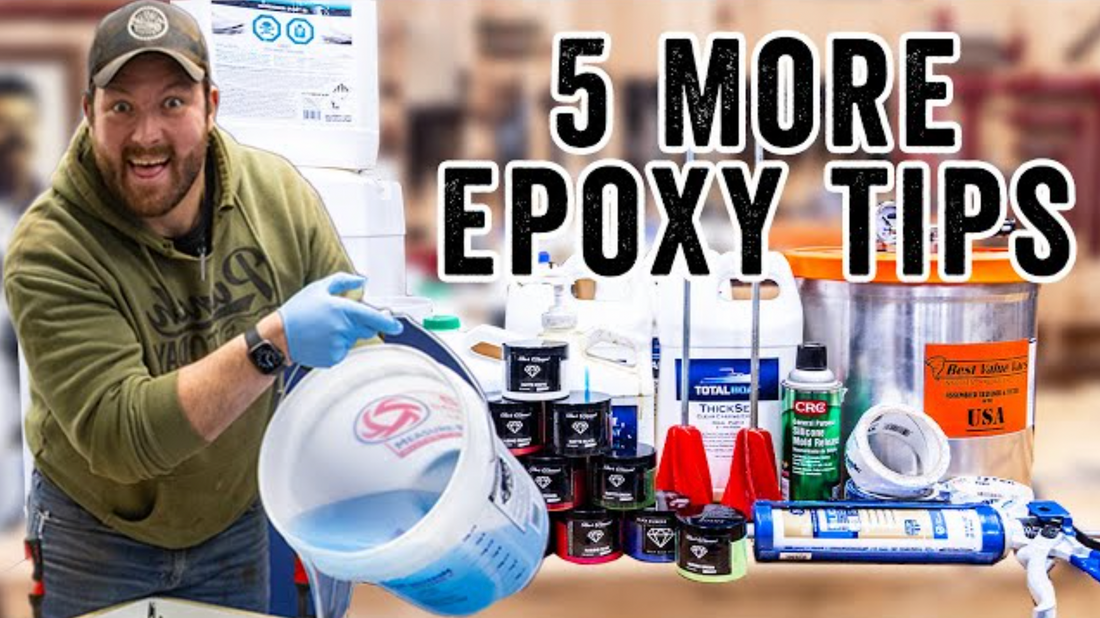
5 More Epoxy Tips I Wish I Knew As A Beginner
Hey everybody. So, a couple of years ago, we posted a video sharing 5 Epoxy Tips I Wish I Knew As A Beginner. A lot of you really liked that video and got something out of it. Since then, I’ve worked on and built a bunch more epoxy projects and picked up a few things along the way.
So here are a few more epoxy tips to make your project a success.
Tip #1 – Keep It Big And Keep It Thick
When you’re doing an epoxy resin project, you need to be thinking about all these factors: shrinkage, dry time, edge profile, air bubbles, and more. So, plan out your project to allow tolerance for imperfections. In other words, build your forms a little bigger.
We build our forms about an inch bigger than we need. That way, we can just cut the whole thing down to the exact size we want. This gives us those clean, crisp edges on everything.
Yep, love keeping things crispy around here.
The second part of this tip is to pour thicker than you need. Sometimes, we try to hit that exact dimension when we’re working on our final piece. That never works with epoxy pours. Got a wonky piece of wood? Pour the epoxy into it and then flatten it. Just use some claps in the meantime if you need to.
The point is you always want it to be thicker than you need. You can always sand or cut down your epoxy, but it’s not easy to add more if it’s too little.
Tip #2 – Calculate Your Pour

All Epoxy kits come with pre-determined pour ratios. Usually either 2:1 or 3:1, so you know how much you need of each part of the mix. The problem is that you don’t always need to use the entire kit on a single project.
Some of you might be trying to, like me, make money, and not just waste a bunch of expensive materials.
So, if you’ve got a large area that you want to fill with resin and you don’t want to prepare resin that you’re then not going to use, calculate the volume of the shape you want to fill.
The simple way to do this is to just find the volume formula for whatever shape you are filling in your project and then add 10% extra (because, you know, stuff happens or it’ll soak up). Use that volume to know how much resin you need.
It’s Math Time Everybody
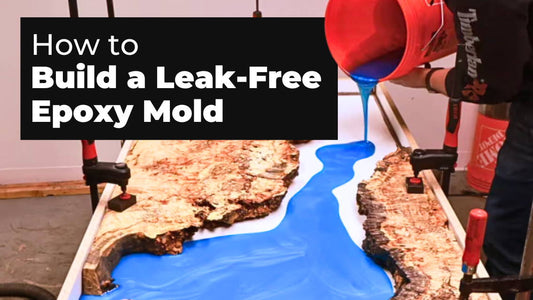
We did a river table a couple of years ago, and it ended up looking pretty cool. The project required us to create a resin river running through a hardwood bartop, as you can see in the picture below. Now, this is not an unorthodox shape, it’s basically a rectangle.
The formula for finding the volume of a rectangular tank is Length x Width x Height. The length is easy; that just needs a measuring tape. So we took that measurement. Let’s say it was 26 feet (312”).
Then, we need the width of the river. To get this, we just took the average width. So, we took a measurement about every 10” to 18” depending on the complexity of the river’s shape. We then added all these measurements and divided that total by the number of measurements we took.
That would look something like this:
Width measurement #1: 6”
Width measurement #2: 7”
Width measurement #3: 4.5”
Those three measurements add up to 17.5”.
17.5” / 3 = 5.8” avg width.
So, now we got the length and the width. To get the height, we just need to measure the depth of the river. We added a ¼” extra to account for the sloping sides of our little river. For this purpose, let’s say the height was about 3”. That would then be 3 ¼” in height.
Boom. That gives us our volume formula: 312” x 5.8” x 3.25” = 5,881.2 cubic inches of resin required. You can then use Google to pull up the cubic inches to liters conversion which, in this case, comes out to around 96 cubic liters. 96 Liters would be equal to 32 (2:1) Kits or 24 (3:1) kits if the kit is measured in liters.
You can also easily convert liters to gallons. Depending on the type of kit you prefer for your epoxy resin, and what container it comes in. 96 liters is roughly 25 gallons. 25 gallons is about 9 (2:1) Gallon Kits and 6.25 (3:1) gallon kits. Always round up if you can when it comes to your volume estimation.
Remember, more is always better than less. If you are working with a shape other than a rectangular tank, just check out one of these free online volume calculators, and it’ll do the math work for you. Just look for the shape that is closest to the one you’re filling.
Tip #3 – Control The Temperature of Your Room

This is one of those things that we woodworking guys can easily just dismiss as being “no big deal”, but trust me, this one is legit. Do not disregard the ambient temperature of wherever you’re pouring epoxy. Our biggest mistakes and problems with our project have come because we don’t have great temperature control in our shop. If your shop or garage doesn’t have great temperature control, consider doing small resin pours in your home in a basement or empty room or some other place that’s okay for work and still has temperature control. We used an office before we moved shops in order to have control over the AC.
The big tip here is to encourage as much airflow as you can get. We have a large fan in our shop to help circulate air and then we set up smaller table fans pointed directly at the resin when it’s time to start drying. These fans do great at moderating the temperatures and moving the off-gas away from the pour.
Getting the temperature right ensure that you don’t let the resin dry too quickly. If you’re like me and you’re always in a rush, you might think faster drying is better, but it’s not. If you’re drying time is too short, you’ve cut off the amount of time for bubbles and gas to escape the resin. This means you’re more likely to have a bubbly, foggy epoxy pour which is not usually what any of us wants on these projects. Fast drying can also lead to shrinkage, cupping, and just a whole bunch of other issues.
Trust. It’s bad. Get yourself some fans.
Last tip for temperature. ALWAYS default to colder temperatures over hot.
Tip #4 – Invest In A Vacuum Pot
I always call this thing a pressure pot but that’s not right, it’s a vacuum pot. We got this one on Amazon and it’s worked great for us so far. You can use it for deep-pour resins that are more likely to have more bubbles. It’s worked great for us so far. Basically, it uses a vacuum pump (which you should also invest in) to remove all the air that can get added when you mix the different parts of the epoxy kit.
Personally, I’ve always found this tool really good when we’re encasing objects or looking for crystal-clear resin. Crystal-clear resin needs to be bubble-free. So the vacuum pot is great for that.
As we already mentioned, time is essential to ensure all the bubbles and gas leave your resin to pour. Vacuum pots can help you shorten that time by getting most if not all of the air out of the pour before you even apply it.
Tip #5 – Line The Bottom of Your Mold With Tape & Release

If you are going to pour any deep pour, you need to line the bottom of your mold where the epoxy will be with a plastic barrier. We use Tyvek Tape for this purpose, and it works really well. Tyvek Tape is used here in America for home construction. Contractors use it to seal the seams of protective wraps that are applied to walls for weather protection.
You could also use packing tape.
Melamine? It works, but with deeper pours it tends to melt and stick to your project.
Some people think it works because it has that plasticky coating. For the most part, this is correct. BUT, its not full proof. Use a sheathing tape and mold release and you’ll get much better results.
Mold release spray? Eh, I think it works, but we prefer the tape or a paste. Sometimes, we’ll use some of that spray on top the tape as well just to try to make things as easy as possible. There are mixed opinions on release sprays and it just depends on whether or not you can find one that you trust and is reliable for the projects you’re working on.
We’ll stick with the tape.
Bonus Tips!

Y’all are the best so I want to go out of my way and give you some bonus tips just because I’m that kind of a helpful guy.
Never use wood with bark on it
Don’t be stupid. I don’t care how it looks. That bark’s gonna come off and your project will be ruined. Take it from me.
Use A Fast-Drying Caulk
We always use a black caulk because it’s easier to see and we found that it tends to release a little better. Don’t think you can go by whatever drying time it says on the label though. We once rushed a project and applied the resin right after waiting the time the bottle said (something like 30 minutes) and the caulk hadn’t dried all the way. Yeah. We had to deal with leaks.
Do yourself a favor and just let your silicone caulk dry overnight.
Use Dry Wood
Wet wood dries out. It doesn’t matter how sealed it is, it will try to dry out. Then it will shrink. Then your resin will crack and you’ll have other problems. It’s just not worth it. Don’t use wet wood.
Liquid Pigments Leak Into Materials And Powdered Pigments Don’t
Remember that different pigments behave differently when used in resin projects. Liquid pigments can bleed quite a bit into the surrounding material when you do a pour. Make sure to completely seal whatever you are pouring into to avoid this.
Honestly, we don’t have to worry about this a ton because you use powdered pigments probably 90% of the time. Still, there’s always that one-off chance you need a liquid one, so good to keep this in mind.
That being said, not all powder pigments will not leak. Lighter woods will always want to absorb color, whether its light or dark. So i advise you seal those edges first.
And that’s all I’ve got for ya. I hope you found this useful. If you couldn’t get enough of these tips and want to hear me explain them all again, here’s the video where I do just that:

Also, if you want to learn more about epoxy pours and tips for how to best use resin, check out our YouTube playlist here!